

In the world of business, transparency and precision are not only highly valued but also crucial for building trust and maintaining long-lasting relationships with clients. One essential aspect of clear and professional communication in financial transactions is the itemized invoice. Whether you're a freelancer, small business owner, or service provider, providing a well-structured and itemized invoice can make all the difference in ensuring prompt payments and satisfied customers.
In this article, we will delve into the art of crafting a flawless itemized invoice that not only showcases your professionalism but also expedites the payment process. We will walk you through each step, from gathering the necessary information to applying sales taxes, discounts, and additional charges.
Purpose of an Itemized Invoice
An itemized invoice serves as a detailed, informative, and structured document that outlines the specifics of a transaction between a seller and a buyer. Its primary purpose is to provide a comprehensive breakdown of the products, services provided, or goods exchanged, along with their corresponding costs. By presenting a clear and itemized list of the transaction details, the detailed invoice enables both parties to have a transparent view of the financial transaction. The key purposes of an itemized invoice include:
Clarity
An itemized invoice ensures clarity and eliminates confusion regarding the goods or services and their corresponding costs or hourly rate. It helps the customer understand the components of the final amount they are being charged.
Transparency
The invoice promotes transparency in the billing process, building trust and credibility between the seller and the customer. Transparency fosters positive client relationships and encourages repeat business.
Dispute resolution
In the event of any discrepancies or disagreements, an itemized invoice serves as a reference point to resolve billing-related issues quickly and friendly.
Legal and tax compliance
Use an itemized invoice as an essential tool for legal and tax records. It provides a clear record of the transaction, making it easier to comply with tax regulations and meet financial reporting requirements.
Professionalism
Presenting an itemized invoice showcases a professional image and approach to conducting business. It demonstrates that the seller values transparency and seeks to maintain a high standard of communication.
Importance of Clarity and Transparency in Billing
A transparent itemized invoice bill plays a pivotal role in fostering positive business relationships and promoting customer satisfaction. The importance of clarity and transparency in billing includes:
Trust building
Providing your customers with transparent itemized bills instills trust, making them more likely to engage in future transactions with the same business.
Customer satisfaction
Clearly communicated itemized invoices help customers understand what they are paying for, reducing the likelihood of misunderstandings and customer complaints. It may contain e.g. item sold, shipping costs, and payment date.
Payment promptness
Transparent invoices with detailed itemization are more likely to be paid promptly by customers, as they can easily verify the accuracy of the charges and the final total.
Legal compliance
Transparent billing practices ensure compliance with legal regulations, reducing the risk of legal disputes and financial penalties.
Reputation and referrals
Businesses that prioritize clarity and transparency in billing develop a positive reputation, leading to word-of-mouth referrals and increased customer loyalty.
How to Create an Itemized Invoice?
Creating an itemized invoice involves a systematic approach that ensures accuracy and professionalism. The key steps to create an itemized invoice are as follows:
Gather information
Collect essential business details such as client/customer information, invoice number, date, payment terms, shipping address, and a list of products or services as well as a total cost.
Itemize products and services
Create a table that includes item descriptions, quantities, unit prices, and total amounts for each product or service.
Apply taxes and discounts
Calculate applicable taxes and any discounts, deducting them from the subtotal to arrive at the final amount.
Include additional charges
Account for any shipping fees or other extra charges, clearly stating their nature and respective amounts.
Calculate grand total
Sum up the subtotal and additional charges, add sales tax and other taxes, and deduct discounts to arrive at the total amount to be paid.
Provide payment instructions
Specify accepted payment methods, payment details, money orders, due dates, and any late payment penalties. Tell your customer if you accept payments online. Add an opportunity to pay via electronic funds transfer so the itemized receipt can be paid quickly.
State terms and conditions
Outline the terms of the transaction, delivery terms, approximate ship date, return policy, and warranty information (if applicable).
Add contact information
Provide contact details for any queries or clarifications, including your business name, street address, phone number, and email.
By following these steps, you can create a well-structured and transparent itemized invoice that not only enhances your professionalism but also promotes positive client relationships.
Itemized Invoice Templates
Before you begin creating itemized invoice templates, it's crucial to gather all the necessary information related to the transaction and the parties involved. Ensuring that you have accurate and complete details will help create a clear and precise invoice. Here are the key steps to gather the required information:
Collect client/customer details
- Full name: Obtain the full legal name of the client or customer to ensure proper identification.
- Address: Record the complete billing address, including street, city, state/province, postal code, and country.
- Contact information: Gather contact details, such as phone numbers and email addresses, to facilitate communication.
Record invoice details:
- Invoice number: Assign a unique and sequential invoice number to differentiate this invoice from others. This aids in tracking and organizing transactions.
- Invoice date: Note the date when the invoice is generated. This date helps establish the billing period.
- Payment due date: Specify the date by which the customer is required to make the payment. This encourages timely payments and sets clear expectations.
- Payment terms: Include the agreed-upon payment details, such as "Net 30" (payment due in 30 days), to provide clarity on the payment schedule.
Gathering accurate information at this stage ensures that you have a solid foundation for creating the itemized invoice. With the client/customer details and invoice specifics in hand, you can proceed to list the products or services in a structured manner, making the invoice easy to read and understand.
Listing products and services
Once you have gathered the necessary information about the client/customer and the invoice details, the next step in creating an itemized invoice is to list the products or services in a clear and organized manner. Properly itemizing the products or services ensures transparency and enables the client/customer to understand the breakdown of charges. Here's how to effectively list the products/services on the invoice:
Create a table
- Use a spreadsheet or invoicing software to create a table for listing the items.
- Set up columns for item descriptions, quantity, unit price, and total amount per item.
Include the following columns
- Item description: Provide a clear and concise description of each product or service offered. Avoid ambiguous terms and use specific details.
- Quantity: Indicate the quantity of each item being sold or the units of service provided.
- Unit price: Specify the price per unit for each item or service. If applicable, clearly state any hourly rates or unit costs.
- Total amount per item: Automatically calculate the total amount for each item by multiplying the quantity with the unit price.
Maintain consistency
- Use a standardized format for item descriptions, making it easy for the client/customer to identify each product or service.
- Ensure that quantities and unit prices are accurate and consistent throughout the invoice.
Add a subtotal for all items
- Sum up the total amounts for each item to arrive at the subtotal.
- Clearly label the subtotal section to indicate that it represents the total cost of the listed products or services.
Provide a brief explanation (optional)
- If necessary, add a brief explanation or notes to clarify any specific details related to the products or services provided.
- This additional information can offer context and enhance understanding for the client/customer.
Listing products or services in an itemized manner not only facilitates transparency but also makes it easier for the client/customer to review the invoice and verify the charges. After accurately itemizing the goods sold or multiple services, you can proceed to apply taxes, discounts, and any additional charges to complete the invoice.
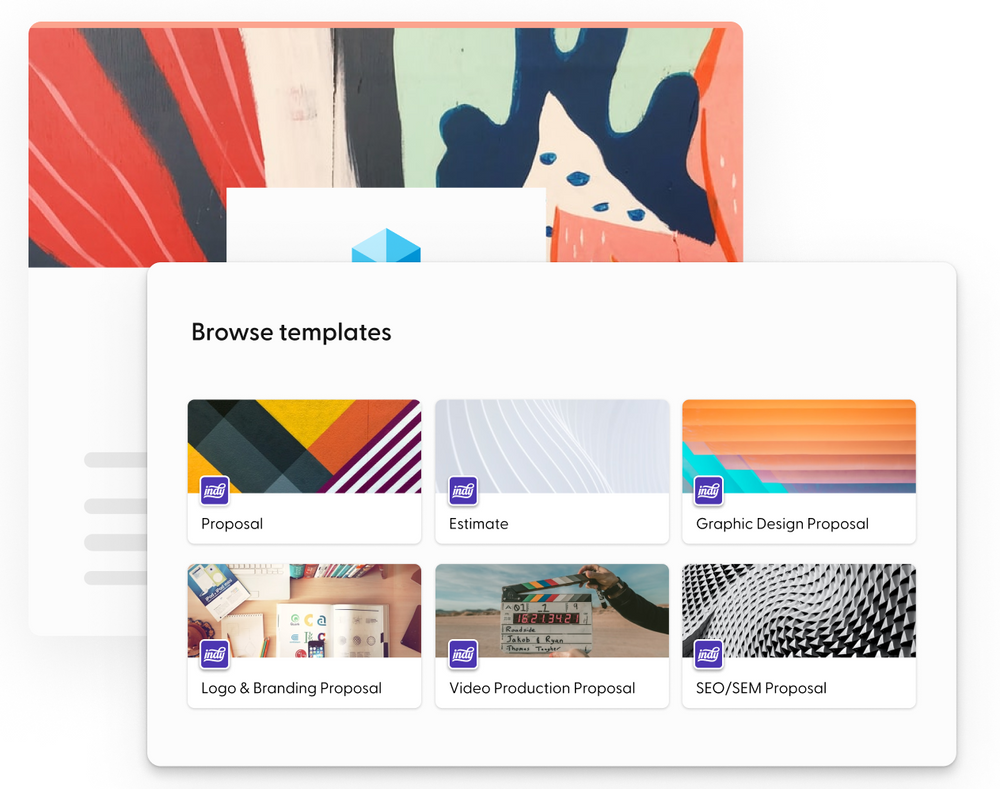
How Indy Can Help?
As a tool for small businesses and freelancers, Indy can help you in many ways. It also provides you with a special bookmark to create invoices. These free invoice templates are a base that can be easily modified into free itemized invoice templates by adding sections you need to bill customers.
The best part, you don't need to print them or make multiple copies. An itemized bill will be sent directly to their email account. You can even accept multiple online and offline payment methods right through Indy and send automated payment reminders to get paid faster. It can literally save time. Get started today for free!
A Small Recap
Mastering the art of creating an itemized invoice is a valuable skill for any business owner or freelancer. By following the step-by-step guide outlined in this article, you can ensure professionalism, transparency, and accuracy in your billing process. Itemized invoices not only provide clarity to your clients but also showcase your commitment to maintaining a well-organized and trustworthy business.
Ready to create an itemized invoice? Indy helps you create invoices in just minutes. Get started today for free!
