

In the vast world of the photography industry, there are many niches to explore. Through the years, product photography has become a big player, mainly because businesses are on the hunt for eye-catching images to showcase their products online, in marketing materials, and all over social media.
So if you're looking to start a professional product photography business, there's never been a better time than right now. In this article, we'll walk through the essentials, from understanding the importance of lighting to building a standout portfolio that catches the eye of potential clients.
Understanding the Basics of Product Photography
Grasping the basics of composition, lighting, and detail capture is crucial for building a solid foundation in product photography.
These basics lay the groundwork for creating visually appealing product images.
The importance of lighting in product photography
One of the fundamental elements that can make or break a product photo is lighting. Natural light is fantastic, but having control over your lighting setup is a game-changer.
Invest in a good quality light source, like softboxes or diffusers, to achieve a balanced and even illumination. Experiment with the angle and intensity of the light to create shadows that highlight product features without being overpowering.
Don't shy away from experimenting with different types of lighting in your product photography setup until you find the one that best suits the mood and style you want to convey in your photos.
Essential equipment for product photography
You don't need a mountain of equipment to start with product photography, but a few essentials can significantly elevate your game.
A sturdy tripod is a must to keep your camera steady and ensure sharp, clear images. Invest in a camera with manual settings that allow you to control aspects like aperture, shutter speed, and ISO for more creative freedom.
Additionally, a selection of lenses, especially a macro lens for close-up shots, can add versatility to your toolkit. Remember, it's not about having the most expensive gear but understanding how to make the most of what you have.
Choosing the right backgrounds and props
The background of your product photos is like the canvas of a painting – it sets the tone for the entire composition.
Consider the colors, textures, and overall aesthetic that align with the product and your brand. Neutral backgrounds are often a safe choice, but don't be afraid to experiment with bold colors or textured surfaces for a unique touch.
Props can add context and interest to your shots, but be mindful not to overshadow the main product. The goal is to enhance, not distract. Keep it simple, and let your product shine in the spotlight.
Mastering composition techniques for product shots
Composition is the art of arranging elements in a frame to create visually appealing and compelling images.
In product photography, pay attention to the rule of thirds – a tried-and-true principle that involves dividing your frame into nine equal parts and placing key elements along these lines. Experiment with different angles to showcase various product features.
For smaller items, consider capturing them from different perspectives to give customers a comprehensive view. Keep in mind that a well-composed photo not only captures the product but tells a story about it.
Setting Up Your Home Studio for Product Photography
Now that you've grasped the basics, it's time to create your own studio for your photography services.
Creating a dedicated product photography space
Find a room or corner with ample natural light or invest in artificial lighting to ensure consistent results. Having a dedicated space allows you to leave your setup in place, saving you time and effort every time you want to capture a new product.
Consider the practical aspects, such as storage for your equipment and backdrops, to keep your space organized and efficient.
Prioritize Natural Light:
- Position your setup near windows to take advantage of soft, diffused sunlight. Natural light provides a flattering and consistent illumination for your product shots.
Invest in Artificial Lighting:
- For spaces with limited natural light or for shooting at night, invest in artificial lighting. Choose softboxes or diffusers to create even and shadow-free lighting. Experiment with the placement of lights to achieve the desired look for your products.
Organize for Efficiency:
- Ensure your dedicated space is well-organized for efficiency. Have designated storage for your equipment, backdrops, and props. This organization not only saves time but also creates a conducive environment for creativity.
Selecting the ideal camera for product shots
While a high-end camera can undoubtedly produce stunning images, the key is understanding how to use the camera you have.
If you're just starting, even a decent smartphone with a good camera can get you going. However, if you're ready to invest, a DSLR or mirrorless camera with manual settings will provide more control over your shots.
Familiarize yourself with your camera's features and functionalities, and don't be afraid to experiment with different settings to understand how they impact your images.
Understand Sensor Size and Megapixels:
- Consider not only the megapixel count but also the sensor size of the camera. A larger sensor often translates to better image quality, especially in low-light conditions. Understanding these specifications helps you make informed decisions about the capabilities of your camera and its suitability for different product photography scenarios.
Explore Advanced Features Gradually:
- If your camera comes with advanced features and shooting modes, don't feel overwhelmed to use them all at once. Gradually explore and incorporate these features into your workflow. Experimenting with one new feature at a time allows you to understand its impact on your product shots and how it aligns with your creative vision.
Utilize Customizable Presets:
- Take advantage of customizable presets on your camera. Set up presets for different shooting scenarios, such as studio sessions, outdoor shoots, or product types. This streamlines your workflow, enabling quick adjustments based on the specific requirements of each product photography session.
Tripods and other stability tools
A shaky hand can lead to blurry photos, and in product photography, sharpness is key.
Invest in a reliable tripod to keep your camera steady, especially when using slower shutter speeds or shooting in low-light conditions. Experiment with different tripod heights and angles to find the most flattering perspective for your products.
Additionally, consider using a remote shutter release or your camera's timer function to minimize any potential camera shake when capturing the perfect shot.
Consider a Gimbal for Dynamic Shots:
- While tripods provide stability, consider investing in a gimbal for dynamic shots. Gimbals stabilize the camera in multiple axes, allowing you to capture smooth and steady video footage or achieve unique angles in product photography. They are particularly beneficial when showcasing products with intricate details through controlled movements.
Explore Tabletop Tripods for Flexibility:
- For tabletop product photography, explore the use of smaller, more portable tripods. Tabletop tripods offer flexibility in positioning your camera closer to the product, especially when shooting smaller items. Experiment with different tabletop tripod setups to find the most effective and convenient arrangement for your specific products.
Invest in a Quality Ball Head:
- If your tripod allows for it, invest in a quality ball head. A ball head provides quick and precise adjustments to the camera's angle and orientation. This level of flexibility is especially useful when capturing products from varying perspectives. A smooth and responsive ball head enhances your overall shooting experience and the efficiency of your workflow.
Remember, you don't need expensive professional equipment to get started, but it's good to invest in higher-end equipment as your business grows.
Mastering Camera Settings for Product Photography
A deep understanding of camera settings, including aperture, shutter speed, and ISO, will give you more creative control over the visual aspects of your product images.
Understanding aperture, shutter speed, and ISO
The exposure triangle – aperture, shutter speed, and ISO – is at the heart of photography, and mastering it is crucial for product shots. Adjusting the aperture controls the depth of field, allowing you to emphasize certain product features while blurring the background.
Shutter speed determines how long the camera's shutter remains open, affecting motion blur.
Lastly, ISO influences the sensitivity of your camera to light. Balancing these settings ensures well-exposed and sharp product images, so take the time to practice and understand their interplay.
- Dynamic Depth with Aperture Bracketing: Try experimenting with aperture bracketing, a technique where you take a series of shots at different aperture settings. This works great when you're photographing products with different depths. It helps you pick the photo that highlights the product features you want to emphasize the most.
- Freeze Motion Creatively with Shutter Speed: Use fast shutter speeds not only for sharpness but also to freeze specific elements creatively. This is effective when photographing products with intricate details or textures. Consider capturing a splash of liquid or the subtle movement of fabrics to add dynamism to your product shots.
- ISO for Artistic Grain: While low ISO values are preferred for clean images, don't shy away from higher ISO settings for creative purposes. In some cases, a touch of grain can add a unique aesthetic to your product photos. Experiment with higher ISO values intentionally to achieve a distinctive look when appropriate.
Utilizing white balance for accurate color representation
Colors play a significant role in product perception, and accurate representation is vital. Adjusting your camera's white balance settings ensures that colors appear natural and true to life. Different light sources have varying color temperatures, so be mindful of the environment you're shooting in.
Whether it's the warm glow of indoor lighting or the cool tones of natural sunlight, setting the white balance correctly ensures your products look as appealing in photos as they do in reality.
- Harness the Power of Presets: Create and use custom white balance presets based on common shooting environments. This streamlines your workflow, ensuring accurate color representation without the need for frequent adjustments. Have presets for indoor, outdoor, and artificial lighting scenarios.
- White Balance Bracketing: Similar to exposure bracketing, experiment with white balance bracketing. Capture a sequence of shots with slight variations in white balance settings. This technique provides flexibility during post-processing, allowing you to choose the most visually appealing color temperature for your product images.
- Consistency Across Your Portfolio: Maintain a consistent white balance across your entire product photography portfolio. This ensures a cohesive look and reinforces your brand identity. Consistency in color representation contributes to a professional and polished overall aesthetic.
Exploring manual mode for precision
While automatic modes can be convenient, manual mode gives you full control over your camera settings. Embrace the learning curve and start shooting in manual mode to understand how each setting contributes to your final image.
This level of control allows you to adapt to different shooting conditions and achieve consistency in your product photography.
Don't be discouraged if it feels overwhelming at first – practice, experimentation, and a bit of trial and error will go a long way in building your confidence with manual mode.
- Mastering Manual Focus: In addition to adjusting exposure settings, practice manual focus to have complete control over where the viewer's attention is directed. This is especially useful for highlighting specific product details. With precision in focus, you can create compelling and intentional compositions.
- Customizing User Modes: Many cameras allow you to save specific settings in user modes. Create custom user modes for different shooting scenarios, such as studio sessions, outdoor shoots, or low-light conditions. This enables quick access to predefined settings, streamlining your workflow.
- Understanding Metering Modes: Explore and understand the various metering modes your camera offers in manual mode. Metering affects how your camera measures light, influencing exposure. Experiment with spot metering for precise control over specific areas of your composition, ensuring accurate exposure where it matters most.
By sharpening your technical photography skills, you can shape your unique style and make yourself more dynamic as a freelance photographer.
Styling and Arranging Products for Captivating Shots
Now that your studio is set up and your camera skills are honed, it's time to delve into the art of styling and arranging your products for maximum visual impact.
Showcasing product features effectively
Start by thoroughly understanding the features and unique selling points of the product you're photographing. Highlight these features by strategically placing them in the frame.
For instance, if you're photographing a watch, focus on capturing intricate details like the dial, hands, and strap.
Utilize close-ups to emphasize texture and quality, giving potential customers an up-close and personal view.
Storytelling Through Composition:
- Consider the narrative you want to convey about the product and use composition to tell a story. Arrange elements in a way that guides the viewer's eyes through the image, emphasizing key features that contribute to the product's overall narrative. This storytelling approach adds depth and engagement to your product photography.
Incorporate Lifestyle Elements:
- Showcase your product in a real-world context by incorporating lifestyle elements into your shots. For example, if you're photographing kitchenware, arrange it within a cooking scene. This not only highlights the product's features but also helps potential customers visualize how the product fits into their lives.
Utilize Negative Space Strategically:
- Experiment with negative space to draw attention to specific product features. Negative space can provide breathing room, directing focus to the essential elements of the product. This minimalist approach can be particularly effective for products with sleek and simple designs.
Creating consistent branding in product photography
Consistency is key when building a brand, and your product photography should align with this principle.
Establish a consistent style that reflects your brand's identity – whether it's through color schemes, lighting choices, or composition techniques. Consistency breeds recognition, making your products easily identifiable and memorable to potential customers.
This doesn't mean every product photo needs to be identical, but there should be a cohesive visual thread that ties your portfolio together.
Define a Visual Identity Guide:
- Develop a visual identity guide that outlines the specific elements contributing to your brand's visual consistency. This guide can include color palettes, lighting preferences, and preferred composition styles. Having a reference document ensures that every product photo aligns with your brand's unique visual identity.
Maintain Consistency Across Platforms:
- Extend your visual consistency beyond your portfolio to all online platforms. Ensure that your product photography maintains the same style on your website, social media accounts, and any e-commerce platforms. Consistency across platforms builds a cohesive brand image for potential customers.
Evolve Without Losing Identity:
- While it's essential to evolve and adapt your product photography style over time, do so without losing the core identity of your brand. Introduce subtle changes gradually to keep your visual language fresh while maintaining the recognizability that consistency brings.
Utilizing different angles for variety
Experimenting with various angles can breathe life into your product photos, adding interest and dynamism. While a straightforward, front-on shot can be effective for certain products, don't be afraid to explore different perspectives.
Try shooting from above, at eye level, or even from below to discover which angle best showcases your product.
Different angles can highlight unique features and create a narrative around your product, making your portfolio more engaging for potential clients and customers.
Highlighting Texture and Material:
- Experiment with angles that highlight the texture and material of the product. Shooting from different perspectives can accentuate the tactile qualities of the item, especially for products with unique surfaces or materials. Close-ups from varying angles provide customers with a detailed and tangible understanding of the product.
Play with Reflections and Mirrors:
- Introduce reflections and mirrors into your shots to create interesting and unexpected angles. Mirrored surfaces can showcase multiple perspectives simultaneously, adding a touch of creativity to your product photography. This technique is particularly effective for products with reflective or glossy surfaces.
Use Unconventional Perspectives:
- Break away from traditional angles and explore unconventional perspectives. Capture products from underneath, sideways, or even through other objects. Unusual angles can generate intrigue and make your product photography stand out in a sea of more conventional shots. Be bold in your experimentation to discover unique and compelling viewpoints.
Post-Processing Techniques for Polished Product Images
Post-processing techniques using tools like Adobe Lightroom or Photoshop add the finishing touch to your product images.
This step ensures a polished and refined look, allowing you to enhance details, correct colors, and maintain a professional standard in your final product photography.
Introduction to image editing software
Even with the best photography skills, post-processing can elevate your images to the next level. Familiarize yourself with image editing software like Adobe Lightroom or Photoshop. These tools allow you to fine-tune exposure, correct colors, and enhance details.
Start with the basics, and as you become more comfortable, explore advanced techniques to bring out the best in your product photos. Remember, the goal is to enhance, not alter – maintain the authenticity of your products while ensuring they look their absolute best.
Retouching and enhancing product photos
Retouching is an art that requires a delicate touch. Remove distracting elements, adjust lighting, and enhance colors to create a polished final image. However, be cautious not to overdo it – maintaining a natural look is crucial in product photography.
Pay attention to details like dust, scratches, or any imperfections that might detract from the overall appeal of the product. A well-executed retouch can make your products look professional and enticing without appearing artificially manipulated.
Maintaining a natural look in post-processing
While post-processing is a powerful tool, it's essential to strike a balance and avoid over-editing. Aim for a natural and authentic look that accurately represents your products. Preserve the original colors and textures, and resist the temptation to rely too heavily on filters or effects.
Your goal is to enhance the inherent qualities of the product, not create an unrealistic portrayal. Strive for a harmonious blend between a polished finish and the genuine essence of your products.
Building a Portfolio and Marketing Your Product Photography
Building a portfolio is not just a showcase of your work; it's a visual narrative of your skills and style, essential for attracting potential clients.
Creating a portfolio that stands out
Your portfolio is your visual resume, showcasing your skills and style to potential clients.
Curate a selection of your best work that demonstrates versatility and proficiency in capturing various products. Organize your portfolio logically, perhaps grouping similar products or styles together.
Remember, quality trumps quantity – focus on showcasing a few exceptional pieces rather than overwhelming viewers with an extensive but mediocre collection.
Your portfolio should tell a story about your capabilities and what sets your product photography apart from the rest.
Tell a Story Through Themes:
- Organize your portfolio around thematic collections that tell a visual story. Whether it's colors, textures, or product categories, grouping images around a theme adds cohesiveness to your portfolio. Themes provide viewers with a deeper understanding of your versatility and creative range.
Highlight Problem-Solving Skills:
- Showcase images in your portfolio that demonstrate your problem-solving skills as a product photographer. Highlight instances where you creatively addressed challenging lighting conditions, unique product features, or specific client requirements. This not only exhibits your technical proficiency but also your adaptability in various scenarios.
Include Behind-the-Scenes Content:
- Offer a glimpse behind the curtain by including behind-the-scenes content in your portfolio. This could be in the form of before-and-after shots, setup images, or even short video clips. Providing insight into your process adds a personal touch and reinforces the effort and dedication behind each stunning product photo.
Using social media to showcase your work
In today's digital age, social media is a powerful tool for showcasing your portfolio and reaching a broader audience. Create accounts on platforms like Instagram, Pinterest, or even LinkedIn, specifically dedicated to your product photography.
Consistently post high-quality images, engage with your audience, and use relevant hashtags to increase visibility.
Social media not only acts as a portfolio extension but also allows you to connect with potential clients, fellow photographers, and industry influencers.
Engage in Meaningful Conversations:
- Don't just post your work; actively engage with your audience. Respond to comments, ask questions, and initiate conversations related to your product photography. Building a community around your work fosters a loyal audience and attracts potential clients interested in your creative process.
Create Interactive Content:
- Elevate your social media presence by incorporating interactive content. Conduct polls, Q&A sessions, or share behind-the-scenes stories through Instagram or Facebook stories. Interactive content not only boosts engagement but also humanizes your brand, making it more relatable to your audience.
Utilize Carousel Posts for Storytelling:
- Take advantage of carousel posts on platforms like Instagram to create visual narratives. Instead of sharing a single image, use multiple slides to tell a story about a particular product or a series of related shots. This not only showcases your creativity but also encourages viewers to spend more time engaging with your content.
Collaborating with brands and businesses
Collaboration is a fantastic way to expand your portfolio and gain exposure. Reach out to local businesses, small brands, or even fellow creatives for potential collaborations.
Offer your services in exchange for product samples or shout-outs on social media. This not only helps you build a diverse portfolio but also establishes valuable connections within your industry.
As you accumulate successful collaborations, potential clients will see that your skills are not only acknowledged but sought after by other businesses.
Research and Approach Strategically:
- Before reaching out for collaborations, conduct thorough research on potential partners. Understand their brand, values, and target audience. Craft personalized pitches that showcase how your product photography can align with and enhance their brand identity. Strategic and well-researched approaches are more likely to result in successful collaborations.
Offer Unique Value Propositions:
- Differentiate yourself by offering unique value propositions to potential collaborators. Whether it's a specific style, a fresh perspective, or a creative concept, clearly communicate what sets your product photography apart. Highlighting these unique aspects makes your collaboration proposals more enticing and attractive to brands.
Build Long-Term Relationships:
- Approach collaborations with a mindset of building long-term relationships rather than one-off projects. Establishing ongoing partnerships with brands and businesses not only contributes to a diverse and extensive portfolio but also fosters trust and loyalty. Long-term collaborations often lead to more significant opportunities and exposure in the industry.
Continuous Learning and Improvement in Product Photography
The life of a photographer is one of constant learning and growth.
By embracing challenges, seeking feedback, and staying updated, you can continue evolving your skill set and have a competitive edge in the dynamic field of product photography.
Joining photography communities and forums
Join online photography communities and forums where you can share your work, seek advice, and learn from others' experiences. Constructive feedback can be invaluable in refining your skills and developing a fresh perspective.
Additionally, these communities provide an opportunity to stay updated on the latest trends, techniques, and industry news.
Seeking feedback and critique
Feedback, whether positive or constructive, is a catalyst for improvement. Don't shy away from seeking critique from peers, mentors, or even online communities. Embrace both praise and suggestions for improvement, as they contribute to your ongoing development as a product photographer.
Constructive criticism is not a reflection of failure but an opportunity to refine your craft and deliver even better results in your next shoot.
Staying updated on industry trends
The field of photography, like any other creative industry, is dynamic and ever-evolving. Stay informed about the latest trends in product photography, from styling and composition to editing techniques.
Follow industry leaders, subscribe to photography blogs, and attend workshops or webinars to stay ahead of the curve. Adapting to emerging trends not only keeps your work fresh and relevant but also positions you as a forward-thinking and innovative photographer.
How Can Indy Help?
Professional photographers don't just rely on their creative skills; they thrive by leveraging the right tools to effectively manage and grow their businesses.
That's where Indy comes in! Here's just some of the ways that Indy fast-tracks your success:
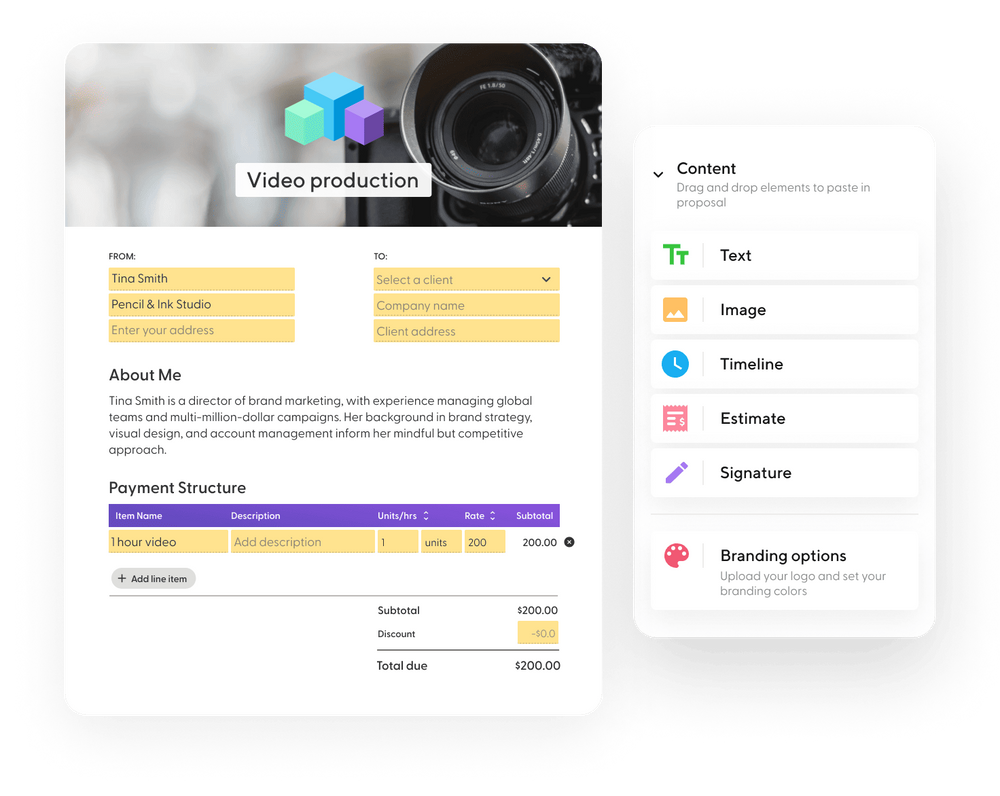
- Proposals: Craft compelling project proposals effortlessly and win more clients.
- Contracts: Get ready-made contracts that protect your business and build trust with clients.
- Forms: Indy has questionnaires, intake forms, project briefs, and feedback forms to help you get the information you need from clients to nail your designs and grow your business.
- Invoices: Generate polished invoices with ease and get paid right through Indy.
- Client Portals: Customer relationship management is crucial for product photographers who want to grow their client base. Chat with clients in real-time, share files, and enhance client satisfaction.
- Files: Upload, store, and share designs and any other documents with clients and get feedback and approval.
- Calendar: Schedule meetings and get a daily, weekly, and monthly view of everything that's due or overdue.
Get all the tools you need to grow your photography business faster. Start today for free!
A Quick Recap
Attracting clients becomes a breeze when you practice these essential product photography tips (with product photography lighting standing out as a crucial cornerstone). As you set up your home studio, master your camera settings, and perfect your post-processing techniques, keep in mind the importance of consistency and authenticity. Your unique style and approach will be what sets your product photography apart from the rest.
Build a portfolio that not only showcases your technical prowess but also tells a compelling visual story about your capabilities. If you're ready to attract clients to your new photography business, there's no easier way than with Indy's proposal and contract templates. Get started with Indy for free and manage your entire business in one place!
